「web備忘録」カテゴリーアーカイブ

普段はwebのほうの仕事も多いのでそちらのお勉強の際のちょっとしたメモ書きです。

【cssnextをすぐ触りたい】2016年夏。cssnextがgulpで動かしてざっくり理解する

フロントエンジニア芸人【cssnextをすぐ触りたい】2016年夏。cssnextがgulpで動かしてざっくり理解する
【cssnextをすぐ触りたい】2016年夏。cssnextをgulpで動かしてざっくり理解する

cssnextとは」というのは他の良記事にお任せします。
とにかくよくわからないけど触っとこう、という説明書読まない派の為に動くものを外国の方のgithub見てこれを作りました。(gulpfile以外ほぼまま)

以下cssnextに対しての現時点での理解。(勉強つう)

PostCSS-cssnext(PostCSSのプラグイン群)っていうプラグインのパッケージ名がcssnextで、ブラウザ間で解釈が違うプロパティ(-webkit-などのプリプロセッサー)や、まだ未実装なプロパティをトランスパイルすることで次世代のCSSを先取りできる。ブラウザの実装を待たなくていい。(ECMAScript2015をbabelでトランスパイルしてレガシーなのにも対応できるように)、自分で定義したプロパティをSassのように変数にして使えたり、ネストも使えたりできる。

CSSにそれらの「nextの記法」を直接書いて、トランスパイルして、生成されたCSSを使う。

例1

したの様にrootに「カスタムプロパティ」をCSS内で定義(今のところの決まり事)して、

:root {
--fontSize: 1rem;
--mainColor: #12345678;
--highlightColor: hwb(190, 35%, 20%);
}

--[customePropertyName]と書く。

var()で値の箇所で呼び出す。calcは返された値を計算してくれるメソッド

body {
color: var(--mainColor);

font-size: var(--fontSize);
line-height: calc(var(--fontSize) * 1.5);
padding: calc((var(--fontSize) / 2) + 1px);
}

トランスパイルされた出力

body {
color: rgba(18, 52, 86, 0.47059);

font-size: 16px;
font-size: 1rem;
line-height: 24px;
line-height: 1.5rem;
padding: calc(0.5rem + 1px);
}

例2
定義

/* custom selectors */
@custom-selector :--heading h1, h2, h3, h4, h5, h6;
:--heading { margin-top: 0 }

custom-selectorというプラグインで--headingというセレクタを定義、値をh1,h2、、としている

:で呼び出し、使っている。(custom selectorsは当然var()ではない。)

生成されるCSS

/* custom selectors */
h1,
h2,
h3,
h4,
h5,
h6 { margin-top: 0 }

と理解しました。

cssnextのplayground

https://cssnext.io/playground/

cssnextの記法

https://cssnext.io/features/

でわまたーー

他のフロントエンド記事

エンジニアにとって大事なこと

今やらなきゃいけないことと、将来に備えてやらなきゃいけないことと、過去の知識を更新しなきゃいけないことと、辛ラーメン5袋入りを買わなきゃいけないこと。

どれもエンジニアにとって大事なこと。
どれか一つ欠けてもだめ

【TypeScript】sh: tsc: command not found (npm run build時)

npm run buildした際にこういうのでたら

sh: tsc: command not found

▀ ╢░░░░░░░░░░░░░░░░░░░░░░░░░░░░░░░░░░░░░░░░░░░░░░░░░░░░░░░░░░░░░░░░░░░░░░░░░░░

npm ERR! Darwin 14.3.0
npm ERR! argv "/usr/local/Cellar/node/6.2.2/bin/node" "/usr/local/bin/npm" "run" "tsc"
npm ERR! node v6.2.2
npm ERR! npm v3.9.5
npm ERR! file sh
npm ERR! code ELIFECYCLE
npm ERR! errno ENOENT
npm ERR! syscall spawn
npm ERR! an2_ts_playgrond@1.0.0 tsc: `tsc -p .`
npm ERR! spawn ENOENT
npm ERR!
npm ERR! Failed at the an2_ts_playgrond@1.0.0 tsc script 'tsc -p .'.
npm ERR! Make sure you have the latest version of node.js and npm installed.
npm ERR! If you do, this is most likely a problem with the an2_ts_playgrond package,
npm ERR! not with npm itself.
npm ERR! Tell the author that this fails on your system:
npm ERR! tsc -p .
npm ERR! You can get information on how to open an issue for this project with:
npm ERR! npm bugs an2_ts_playgrond
npm ERR! Or if that isn't available, you can get their info via:
npm ERR! npm owner ls an2_ts_playgrond
npm ERR! There is likely additional logging output above.
npm WARN Local package.json exists, but node_modules missing, did you mean to install?

npm ERR! Please include the following file with any support request:
npm ERR! /Users/No51/Desktop/Git/angu2_type/an2_ts_playgrond/npm-debug.log
▀ ╢░░░░░░░░░░░░░░░░░░░░░░░░░░░░░░░░░░░░░░░░░░░░░░░░░░░░░░░░░░░░░░░░░░░░░░░░░░░

npm ERR! Darwin 14.3.0
npm ERR! argv "/usr/local/Cellar/node/6.2.2/bin/node" "/usr/local/bin/npm" "run" "build"
npm ERR! node v6.2.2
npm ERR! npm v3.9.5
npm ERR! code ELIFECYCLE
npm ERR! an2_ts_playgrond@1.0.0 build: `npm run tsc && npm run browserify`
npm ERR! Exit status 1
npm ERR!
npm ERR! Failed at the an2_ts_playgrond@1.0.0 build script 'npm run tsc && npm run browserify'.
npm ERR! Make sure you have the latest version of node.js and npm installed.
npm ERR! If you do, this is most likely a problem with the an2_ts_playgrond package,
npm ERR! not with npm itself.
npm ERR! Tell the author that this fails on your system:
npm ERR! npm run tsc && npm run browserify
npm ERR! You can get information on how to open an issue for this project with:
npm ERR! npm bugs an2_ts_playgrond
npm ERR! Or if that isn't available, you can get their info via:
npm ERR! npm owner ls an2_ts_playgrond
npm ERR! There is likely additional logging output above.
npm WARN Local package.json exists, but node_modules missing, did you mean to install?

npm ERR! Please include the following file with any support request:
npm ERR! /Users/No51/Desktop/Git/angu2_type/an2_ts_playgrond/npm-debug.log
[an2_ts_playgrond]

--------------------------

sh: tsc: command not found

これ。
tscがコマンドでパス通っていない可能性大
npm install tsc

をやってみてください。
npm のグローバルのパスが通っていればうまくいくはずです。

Angular2 for TypeScriptのお勉強-sample(10)【NgForm and template reference variables、{{}}と[]、""の違いとか】

フロントエンドエンジニア芸人もりたけんじのAngular2とTypeScriptのお勉強

今日はちょっと長い。

チュートリアルでいうここを読んでます

submitでわたされるのはngFormというオブジェクトみたいです。

template側


<form #theForm="ngForm" (ngSubmit)="onSubmit(theForm)">
<label for="name">Name</label>
<input required ngControl="firstName" [(ngModel)]="current.firstName">
{{current.firstName}}
<button type="submit" [disabled]="!theForm.form.valid">submit</button>
</form>

太字で示したtheFormとはHTMLFormElementです。

ngFormとはそのHTMLFormElementをNgFormとしてラップしたAngularのビルドインディレクティブです。

上記のコードはonSubmitとしてsubmit時theFormを渡しています。

Component側
export class ChildComponent {
onSubmit(formValue){
console.log(formValue);
}
}
で受け取り、

console出力してみました。
スクリーンショット 2016-06-25 9.37.01

template側の記述に「ngControl="firstName" 」としているところがあると思います。

inputにng-controls="firstName"とすると
そのオブジェクトから参照できます

スクリーンショット_2016-06-25_9_45_04


Input and output properties

This section concentrates on binding to targets, which are directive properties on the left side of the binding declaration. These directive properties must be declared as inputs or outputs.

bindingへのターゲット(=の左側にあるdirectiveプロパティ)は出力か入力として宣言されなければならない

データバインディングターゲットとデータバインディングソース

コード上「=」の左側にあるのがデータバインディングターゲット。

それらは[]か()、もしくは[()]される。

コード上「=」の右側にあるのがデータバインディングターゲット。

それらは""か{{}}される必要がある。

データバインディングソースは自動的にbindingされているので、特別にdirectiveのメンバーにtemplate expression({{}}。二重ブラケット)やstatement(""。二重符)の中でアクセスする必要はない

ちょっと脱線してAngular2によるデータの流れ

データの流れは3種類。
チュートリアルのここをよんでいます。

1.One-way from data source to view target(データソースからビューターゲットへの一方通行)

・{{expresson}}
・[target] = "expression"
・bind-target = "expression"

bindingできるタイプ
Interpolation
・・Property
・Attribute
・Class
・Style
※PropertyとAttributeの違いが分からない方はこちら
※Interpolationというのはtemplate文中で{{}}で描画しているところですかね。それが直接component propertyを参照している
Interpolationは最初にAngular

2.One-way from view target to data source(ビューターゲットからデータソースへの一方通行)

・(target) = "statement"
・on-target = "statement"
ここで出てくるstatementと上のexpressionの違い
template-expressionのターゲットはhtml要素かcomponentか、directive。{{1+1}}。インターポレーションの中にかいた「1+1」の部分ね。
これらは評価して値をターゲットに返していますね。以前の記事参照

template-statementはここによると
componentやディレクティブ、要素にbindeingされたイベントに対応する。

例(event)="statement"
ここの左部分でeventをハンドリングするってことかな。

「この方法以外でイベントに対応するのは意味がない」と書かれています。

Responding to events is the other side of Angular's "unidirectional data flow". We're free to change anything, anywhere, during this turn of the event loop.
イベントの定義はAngularのdirective data flowの管理外。イベントループの間、どこでも自由に変えられる。

template expressonと statementの解析は異なる。
statementの方はJavaScriptのような「=」の代入や「;」や「,」が使える
だがstatement内で下記は使えない
・new
・increment and decrement operators, ++ and --
・operator assignment, such as += and -=
・the bitwise operators | and &
・the template expression operators

template statement は window、document、console、Math等の参照はもっていない。

(click)="onSave()"
こう書かれていたら、onSaveはcomponentのインスタンスメソッドにdata-bindingされているメソッドです。
それは
昨日の記事のようにobjectを渡すことができる:see

3.Two-way

・[(target)] = "expression"
・bindon-target = "expression"

※後日postします。

今日は長かったね〜。疑問点追っていったらこうなった。。

今回のコード

でわまた〜〜

前のAngular2記事へ

次のAngular2記事へ

他のAngular2記事

他のjavascript記事

スクリーンショット 2016-06-26 10.20.33
RxJSに興奮を覚えた日
水不足も心配な日

RxJSドキュメント

[理解したこと]
ストリームというイベントの流れを「Observable」。
click というユーザーのアクションをObservableというオブジェクトが返ってくるようにRx.Observable.fromEvent等に登録(第一引数にtarget、第二引数にイベント)、
返り値、ストリーム(Observable)を作って「オペレーター」(map,fileter,reduce等)で操作、その際の返り値もObservableなのでチェーンできる。出来上がったストリームをsubscribe(購読)。subscribeの第一引数にObserveという関数オブジェクトを渡しておくと結果を操作できる

JS Bin on jsbin.com
参照

Angular2 for TypeScriptのお勉強-sample(9)【inputの入力値を扱う。Referencing a template reference variable】

フロントエンドエンジニア芸人もりたけんじのAngular2とTypeScriptのお勉強

input値をbuttonに仕込んだイベントから参照、イベントに渡す方法です。
チュートリアルのここです。

#として設定

<input #phone placeholder="phone number">
<button (click)="callPhone(phone.value)">call</button>

ref-prefixとして設定

<input ref-fax placeholder="fax number">
<button (click)="callFax(fax.value)">Fax</button>

input要素に#phoneとすることでbutton要素がphoneへの参照を可能にしています。
ref-faxもやはりbutton要素からfaxへの参照を可能にしています。

上記のことは同じ要素か、兄弟要素か、子要素に対してできるようです。

試してみたのがこちら

<button ref-oneself (click)="callOneself(oneself.value)" value="it's me!">it's me!</button>
自分自身のvalueを参照しています。

コンポーネント側

export class ChildComponent {
callPhone(value){
alert(value);
}
callFax(value){
alert(value);
}
callOneself(value){
alert(value)
}
}

なるほどですねーー。

今回のコード

でわまた〜〜

前のAngular2記事へ

次のAngular2記事へ

他のAngular2記事

他のjavascript記事

【Angular2_TypeScriptのtsconfig】error TS5023: Unknown compiler option 'moduleResolution'. とsh: browserify: command not found

build時に
error TS5023: Unknown compiler option 'moduleResolution'.
のようなエラー出たら
tsconfig.json。
moduleResolutionはモジュールを読み込むとき使うもの。

もしどこかから貼り付けただけのtsconfigなら多分初期化されてもいいとおもうので、下記のこちらをぺっとやるとうまくいきます。
https://github.com/angular/ts-quickstart/blob/master/tsconfig.json

moduleResolutionっていうのが何かのバージョンとうまくいっていない模様。何かは調査ちう
取り急ぎ。

sh: browserify: command not found

npm i -g browserify
してください

【npm】npm i でpackageのバージョン指定、上げたくない時

npm i で勝手にバージョン上勝手しまうことがあります。
それは
package.jsonのバージョン指定が

fafafa : ^2.5.0

とかになっているからです。
この場合もし2.5.1とかバージョンが上がったら
npm installで上がってしまいます。

もしnpm i でpackageのバージョン指定、上げたくない時

npm install --save --save-exact [packagName]

とやるといいです、

npm config ls -l
とやってみてください。
npm の設定が見れます。

【npm】npm i でpackageのバージョン指定、上げたくない時

そこに書いてある
save=true
save-exact=true

はnpm i 時に自動でそれをオプションなしでやってくれます。
もしfalseになっていたら

ターミナルで
npm config set save=true
npm config set save-exact=true

をしてください。
npm config ls -l
でtrueになったことを確認してください。

これでオプションなしで、表題のことをやってくれます。

でわまたー

Angular2 for TypeScriptのお勉強-sample(8)【requireTemplate and TemplateUrlの違い。moduleIdとは】

フロントエンドエンジニア芸人もりたけんじのAngular2とTypeScriptのお勉強

templateとtemplateUrlは知っていたのですが、

templateUrl

1、
@Component({
selector : 'fafa-faf',
moduleId : module.id,
templateUrl : '.app/app.childComponent'
})

とする場合と

require template

2、
@Component({
selector : 'fafa-faf',
moduleId : module.id,
template : require('.app/app.childComponent'),
moduleId: module.id
})
とする場合は何が違うのでしょう。
ここによると

1の場合はhtmlへの PATH。
2の場合はstring。文字列が返り値。templateに割り当てている。なので同じ結果に。

requireを使いたいときは"template"としなくてはいけません。

moduleId

moduleIdを付けることで、Angularがルートからファイルを探し始める代わりに現在のフォルダから探し始めます。

つまり
app/app.childComponent.html
app/app.childComponent.ts

こういう階層になっていた場合
moduleId: module.id
を設定するだけで

Angularは呼び出し元のファイルから同階層のファイルを探す。
なので記述が

2の例だと
@Component({
selector : 'fafa-faf',
moduleId : module.id,
template : require('app.childComponent'),
moduleId: module.id
})

こうなるわけ。見やすい!!
moduleIdについてはここ

今回は
・templateUrlとtemplate requireの違い
・moduleId

を覚えました。

moduleIdは積極的に設定しましょう!

今回のコード

でわまた〜〜

前のAngular2記事へ
次のAngular2記事へ

他のAngular2記事

他のjavascript記事

Angular2 for TypeScriptのお勉強-sample(7)【boundとinterporation】

フロントエンドエンジニア芸人もりたけんじのAngular2とTypeScriptのお勉強

ここのページの「Binding syntax: An overview」を読んでいます。

[]と{{}}が何をしているのか理解します。


スクリーンショット 2016-06-21 22.04.30

チュートリアルでいうここです。

[]=""はそのDOMが持つプロパティを""でbindしている。

これはわかりやすい例。bindStyleはそのコンポーネント内でpropertyとして読み書きできる{{}}はそのproperty値を動的に出力しています

このことを説明するもうひとつの例
<span>{{lunch}}is good!!</span>

<span><span [innerHTML]="lunch"></span>is good!!</span>
は同じ意味ですね。

@Component({
selector: 'contacts-header',
templateUrl: `./app/app.childComponent.html`
})
export class HeaderComponent {
lunch: string = "lunch";
constrctor (){
}
}


なんか薄い感じでごめんなさい。ちょっとずつやっていっています

Angular2 for TypeScriptのお勉強-sample(6)【classの置き換え,override】

フロントエンドエンジニア芸人もりたけんじのAngular2とTypeScriptのお勉強

classを修正するのはよくするところなのでそこらへん。

チュートリアルのここ見ながら確認

今回やっていること

・普通にclassとして要素に記述する
・それをリセットして反映させる[class]
・メタデータにstylesとして子directiveのstyle制御
・子directiveをtemplateUrlとしてhtmlファイルで管理する

app.childComponent.html

<nav class="navbar-fixed"><span class="">Contacts</span></nav>

app.component.ts
@Component({
selector: 'contacts-header',
templateUrl: `./app/app.childComponent.html`,
styles: ['.navbar-fixed { position:fixed; }']
})
export class HeaderComponent {
colorBlue: string = "colorBlue";
constrctor (){
}
}

なんてことないですが、ちょっとずつ確認してこーと思います

今回のコード

でわまた〜〜

次のAngular2記事へ

他のAngular2記事

他のjavascript記事

【git】遊びながら覚える「git real」と今まで書き溜めてきたgit commandメモ

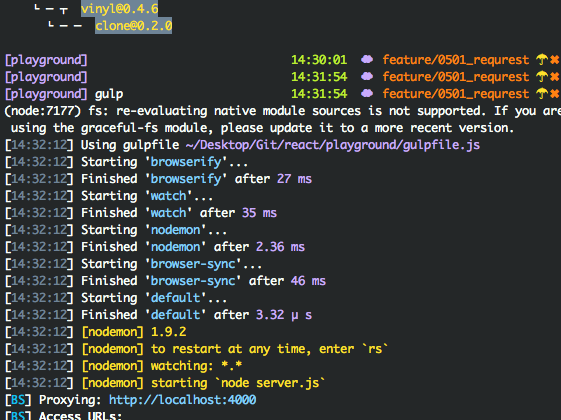
git playgroundで検索したら

スクリーンショット 2016-06-19 17.09.19

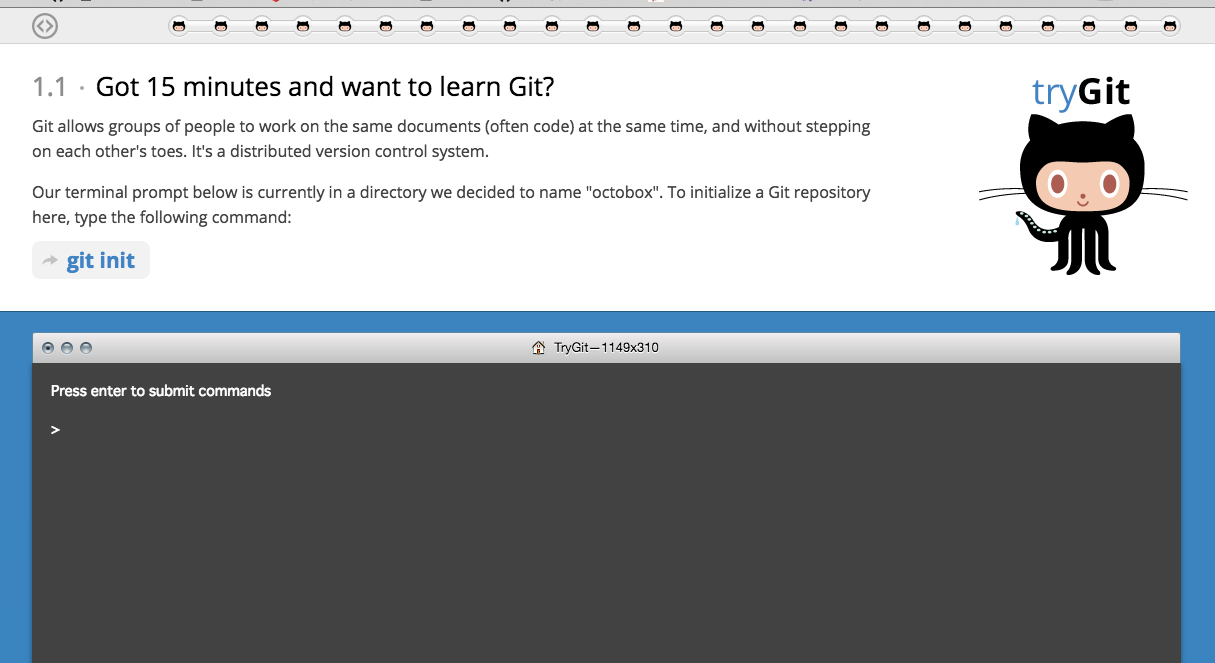
こういうのでてきて、ただただ言われたとおりしていたら

ステージが変わって、
こういうの出てきたよ
スクリーンショット 2016-06-19 17.06.06

https://gitreal.codeschool.com/levels/1

言われたとおりやるのではなくて自分で考えながらコマンド打ちなさいってことみたいですね

以下今まで自分がEvernoteに書き溜めながらメモしていた奴。

------------------------------
git log —oneline master..feature(今居るブランチ) masterに含まれていないリビジョンを調べる

git status -s
git l

git config の使い方
https://transitive.info/article/git/command/config/

git config -l gitの設定を表示

git reset —soft HEAD^
git commit —amend

git diff master:fafa.txt dev:fafa.txt 特定のブランチ間のファイル差分
git diff master fafa.txt masterブランチのfafa.txtと現在のブランチのfafa.txtの差分
git diff —name-status 変更されたファイル名だけ取得
git diff HEAD^ HEAD 直前のcommitによる変更表示
git diff —cached 次のcommitで反映されるindexとHEADの差分
git diff まだaddしていないインデックスとワーキングツリーの差分
git diff master post/0124
git diff —name-only master dev — some-file
git diff —staged
git diff —unified=1 HEAD~ HEAD

誤って削除したstashを復活させる
https://www.d-wood.com/blog/2015/02/12_7407.html

インデックスに対しての作業ツリーのdiffを破棄する
https://d.hatena.ne.jp/perlcodesample/20090702/1246679588
特定のファイルを元に戻す
git checkout ファイル名

全て元に戻す
git checkout .

※checkoutは新しく追加したファイルは削除されない

log
log --graph --all --pretty=format:'%Cred%h%Creset -%C(yellow)%d%Creset %s %Cgreen(%cr) %C(bold blue)<%an>%Creset' --abbrev-commit --date=relative

コンフリクト対応
git checkout —ours [home.md]
git add home.md

相手側
git checkout —theirs home.md

リモートリポジトリのブランチを削除
git push origin :

直前の作業ブランチに戻る
git checkout -

git rebase -i HEAD~3 (HEADから3つ分のコミットを編集)

pickをsquashに変更すると上のコミットに統合される

git stash save "メッセージ"
git stash pop 取り出して適用
git stash list

clone ローカルリポジトリにリモートリポジトリを取り込む
git clone
(localでgit init したと同様にローカルリポジトリが作られる)

originの意味
git push origin = git push : urlというリポジトリに対してローカルブランチをリモートブランチにプッシュするという意

トラッキングブランチを参照
git log origin/lesson

fetch
リモートリポジトリの情報をローカルリポジトリのトラッキングブランチに反映させる
git fetch
git pulとの違いはpulは作業ブランチ状態もリモートの状態で更新されましたがfetchはトラッキングブランチが同期されるだけ。作業ブランチはそのまま

git reset —hard origin/ 作業ブランチの状態をトラッキングブランチと同期

rebase
git checkout lesson
git rebase master(masterの変更を取り込んだ上で自分の変更コミットをHEADにする)

git rebase —abort (リベース失敗した場合戻したいとき)

https://gist.github.com/yatemmma/6486028
別ブランチで作業中masterの変更を取り込む際
master最新コミットから派生したブランチにする。その際コチラの変更コミットが先頭だがことなるコミット番号として反映される
mergeは変更を取り込んだmergeコミットを先頭に作る

別ブランチの特定のコミットだけ取り込みたい場合
git cherry-pick

git log —oneline(端的に表示) —graph(線で表示) —decorate(ブランチ名も表示)

mergeする場合(masterに移動してmerge)
git checkout master
git merge

git push origin git branch -m ブランチ名変更

fast-foward
masterから新しいブランチ作成した時点でそのブランチがmasterのcommit全て引き継いでいる状態のこと

git reset 特定のリビジョンまで戻す(HEADが先頭になる)
git checkout 特定のリビジョンまで(HEAD)を移動
→detach状態(浮いた状態) 変更を加えてgit checkout -b か git checkout masterか決める
https://devlights.hatenablog.com/entry/20130417/p1

git commit —amend -m “コミットメッセージを変える"
git revert ある特定のリビジョンの修正を打ち消すコミット。プラマイ0
git revert —no commit 上は自動でコミットされるが、コミットしたくないばあいは--no commit
git reset —soft HEAD^

git config —global user.name kenji merit

git rebase -i HEAD~2
:q(vimの終了)

git fetch --all

eho fafafa > fafa2.html (今のフォルダ内にファイルを生成)

git mv fafa.html fafa2.html (ファイルの名前変更)
git show —pretty=fulley (詳しいログ情報)
git reset HEAD^ 一つ前に戻る

git log -1(コミット1つだけ)  -p(コミットによる差分)

rm
git rm —cached fafa.html (addされているファイルを作業ツリーにもどす)

log
git log
git log -p -2 (変更内容 , 直近の2つ)
git log --graph
git log —since=2.weeks
git log —abbrev-commit —abbrev=4 —pretty=oneline -10
⑩の短いリビジョン
最後に —author=“kenji merita"
とすると自分のが出てくる

git log --graph --name-status --pretty=format:"%C(red)%h %C(green)%an %Creset%s %C(yellow)%d%Creset"

status
git status
git status -s 状況調査の短縮(出力がなければリポジトリはクリーン)
git status -b現在のブランチについての情報

branch
git branch 表示
git branch —contains (現在のブランチ)

checkout
git checkout [branch]
git checkout -b 0411 origin/master
git checkout -b 0411_2 (現在居るブランチから新たに派生したブランチを作る)

add
git add *** ***
git add -A
git add -u (変更された全てのファイルをステージング)

commit
git commit -m “*****"
git commit —amend -m “修正コミットメッセージ” (quite)、追加したいファイルをindexにaddして実行すると直前のコミットを変更できる
●コミット名変更
git commit —amend→スペース E→編集→ecp→shift ZZ
^(カレット)
~(チルダ)

push
git push origin 0408
git push origin 0411

reset
git reset ステージングされたファイルをアンステージング
git reset —hard (コミット前の全ての変更をなかったものにする)
リビジョンの復元
①git reset -hard [REVISION]
SHA-1名が分からない場合 git reflog

今戻したリビジョンをやっぱりやめて最新状態
git reset —hard [REVISION]

stash
git stash save
git stash show
git stash list -p
git stash apply スタッシュ名[stash@{0}](stash は残る)
git stash pop(stash は破棄)
stash@{1} のように引数を指定することによって、特定の作業を復元することができます。
git stash drop
git stash clear

[fix]refs #110 削除フラグが更新されない不具合の修正
レッドマインと紐付けられる
gitk
git diff

4/10
git diff 0408 master

git log —no-merges
git branch -a (リモートとローカルブランチの確認)

git reflog コミット一覧
git logのおすすめコマンド

git log --graph --name-status --pretty=format:"%C(red)%h %C(green)%an %Creset%s %C(yellow)%d%Creset"

git reset —hard [commit no] 現在のブランチをここコミットまで戻して作業も戻す

git diff 183080c d34ef9c
(コミットとコミットの差分)

git revert

git log --pretty=oneline --since="2014-12-20" --until="2015-01-01" -5
期間指定

git log --pretty=format:"%an --- %H"

Gitリポジトリの作成
git init 0301(file name) リポジトリを初期化、作業フォルダを指定

リポジトリ内に移動、ファイル作成
vi kennjimorita.txt

②git checkoutでリビジョンを復元する
git checkout [REVISION]
git status -sb →##HEAD (no branch)
git logで確かめる

されに最新に戻すには
git checkout master

git status -sb

リポジトリ内がクリーンかダーティか
detached HEAD状態か通常の状態か
調べることができる

新たなリポジトリ
git init 04-01
cd 04-01
echo new > new.txt (新ファイル)
echo [Some other Txt] > new.txt (中身を記述)
ls (確認)

ステージングエリアから下げる
git rm —cached — [fileName]
git reset — [fileName]

------------------------------

-------
0418
-------
git log —oneline —graph —all —decorate
git branch -a -vv (「通常のブランチ。追跡ローカルブランチ追跡リモートブランチ」が見れる)

git remote rm origin リモートブランチ
git remote -v
git reset --soft HEAD^
直前のコミットを取り消し(index,ワーキングツリーはママ)

(リモートリポジトリのチェック)

reset を なかったことにして最新のHEADまで戻す
git reset --hard ORIG_HEAD
git reset --hard dbbd342
git reset は未追跡のものには何もしない
git clean -f(全ての未追跡ファイルを削除)
git clean -n(削除ファイル予定のリストを表示)

git branch -d [branchname]
git branch -D [branchneme](失われるリビジョンを含むため強制削除)

index,working treeがdirty状態だとreset —hard で戻るとそれらは消える stash かcommitしてからresetすること

detached HEAD状態になったら
https://d.hatena.ne.jp/nishiohirokazu/20110513/1305290792

git status -sb
現在の状態が簡潔に見れる

git show doc:m1.txt

別ブランチのファイルをcheckoutする
git show [REVISION]:[FILENAME]
別ブランチのファイルをcheckoutして他のファイル名に変更する
git show [REVISION]:[FILENAME] > [new-file-name]

git clone-with-branches 06-01 06-02

ブランチも同時に新しいクローンを作る

gitk —all &

カレントとそれ以外のダイヤグラムがみれる
GUI立ち上げる

git log —oneline —graph —decorate —all
でもみれる
CUIの中で表示

—decorate (info,master,doc,HEAgit Dなどのシンボルリファレンスを表示)
—oneline (SHA-1を7行、コミット毎の出力を1行に)
—all (リポジトリ内全てのブランチに格納されているリビジョンを表示)
-------------------------------
いちいちブランチを切り替えてlsでファイルを表示させない方法
git show [branchName]^{tree}

git branch -v
(全てのブランチと最新リビジョン)

git pack-refs —all
.git/packed-refsファイルに全てのブランチのリファレンスを格納

open -a TextEdit ~/.gitconfig

コマンドラインでファイル指定してOPEN
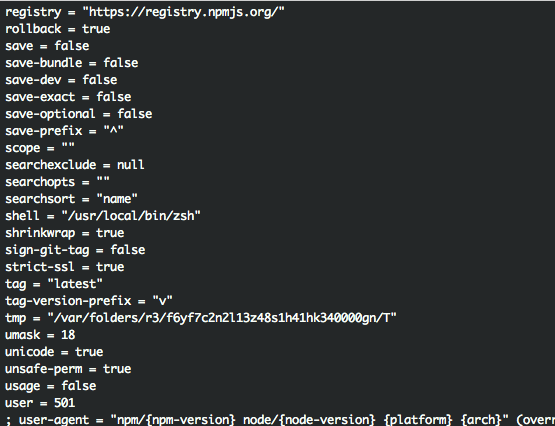
.gitconfigのエイリアス設定
[core]
excludesfile = /Users/No51/.gitignore_global
quotepath = false
[difftool "sourcetree"]
cmd = opendiff \"$LOCAL\" \"$REMOTE\"
path =
[mergetool "sourcetree"]
cmd = /Applications/SourceTree.app/Contents/Resources/opendiff-w.sh \"$LOCAL\" \"$REMOTE\" -ancestor \"$BASE\" -merge \"$MERGED\"
trustExitCode = true
[user]
name = Kenji Morita
email = kennjimoritata@yahoo.co.jp
[filter "media"]
required = true
clean = git media clean %f
smudge = git media smudge %f

# ===[ALIAS-START]===

[alias]
c = config -l
s = status -sb
l = log --pretty=oneline --abbrev-commit --abbrev=4 --decorate -25
ll = log --pretty=oneline --abbrev-commit --abbrev=4 --decorate
g = log --pretty=oneline --abbrev-commit --abbrev=4 -25 --graph --decorate
gg = log --pretty=oneline --abbrev-commit --abbrev=4 --graph --decorate
rp = rev-parse --short=4
b = branch
ss = !git snapshot
save = !git snapshot

# General purpose aliases:
# snapshot
# backup
# stat
# days
#
# Educational aliases:
# create-file
# simple-commit
# multiple-commit
# simple-loop
# simple-loop2
# clear
# branches

# Alias: snapshot
# Example:
#
# git snapshot This is my very important commit...
# git snapshot "This is my very important commit...
# git snapshot
#
snapshot = "!snapshot() { COMMENT=wip; if [ \"$*\" ]; then COMMENT=\"$*\"; fi; git add -A; git commit -m \"$COMMENT\"; }; snapshot"

# Alias: backup
# Example:
#
# git backup This is my very important commit...
# git backup "This is my very important commit..."
#
backup = "!backup() { git snapshot \"$*\"; git push; }; backup"

# Alias: days
# Example:
#
# git days
#
days = "!days() { git log --pretty=format:%cd --date=short | uniq; }; days"

# Alias: stat
# Example:
#
# git stat
#
stat = "!stat() { echo -n Number of revisions:; git log --oneline | wc -l; echo -n Number of developers:; git shortlog -s | wc -l; echo -n Number of days:; git days | wc -l; echo -n The working directory:; du -h -s --exclude=.git; echo -n The git directory:; du -h -s .git; echo -n Number of files in the working dir:; git ls-files | wc -l; }; stat"

# Alias: create-file
# Example:
#
# git create-file lorem
# git create-file lorem ipsum dolor
#
create-file = "!createFile() { for name in \"$@\"; do echo $name>$name.txt; done; }; createFile"

# Alias: simple-commit
# Example:
#
# git simple-commit a
# git simple-commit a b c
#
simple-commit = "!simpleCommit() { for name in \"$@\"; do git create-file \"$name\"; git snapshot $name; done; }; simpleCommit"

# Alias: multiple-commit
# Example:
#
# git multi-commit lorem
# git multi-commit lorem ipsum dolor
#
multi-commit = "!multiCommit() { for name in \"$@\"; do git create-file $name; done; git snapshot \"$*\"; }; multiCommit"

# Alias: simple-loop
# Example:
#
# git simple-loop lorem 5
#
simple-loop = "!simpleLoop() { NAME=$1; i="1"; while [ $i -le $2 ]; do git simple-commit $NAME$i; i=$[$i+1]; done; }; simpleLoop"

# Alias: simple-loop2
# Example:
#
# git simple-loop2 lorem 7 13
#
simple-loop2 = "!simpleLoop2() { NAME=$1; i=$2; while [ $i -le $3 ]; do git simple-commit $NAME$i; i=$[$i+1]; done; }; simpleLoop2"

# Alias: branches
# Example:
#
# git branches lorem ipsum dolor
#
branches = "!branches() { for name in \"$@\"; do git branch $name; done; }; branches"

# Clonning with remote branches
#
# Command to list remote branches:
#
# git branch -r | sed "/->/d; s/ origin\///g"
#
list-remote-branches = "!listRemoteBranches() { git branch -r | sed \"/->/d; s/ origin\\///g\"; }; listRemoteBranches"
checkout-remote-branches = "!checkoutRemoteBranches() { for name in `git list-remote-branches`; do git checkout $name; done; }; checkoutRemoteBranches"
#
# Example:
#
# git clone-with-branches dirSrc dirDest
#
clone-with-branches = "!cloneWithBranches() { git clone $1 $2; cd $2; git checkout-remote-branches; git remote rm origin; }; cloneWithBranches"

#@todo: check parameters:
# git clone-with-branches URL

# Example:
#
# git checkout beta
# git set-version 0.1.0
#
# assumptions:
# - clean repo
#
# @git get-version === cat version.txt

set-version = "!setVersion() { echo $1 > version.txt; git snapshot Version $1; git tag -a v$1 -m \"Release $1\"; }; setVersion"
get-version = "!getVersion() { cat version.txt; }; getVersion"

# Remove old commits
#
# git clear-reflog-now
#
clear-reflog-now = "!clearReflogNow() { git reflog expire --all --expire=now; }; clearReflogNow"
remove-old-commits = "!removeOldCommits() { git clear-reflog-now; git prune; }; removeOldCommits"

#
# ===[ALIAS-STOP]===

Angular2 for TypeScriptのお勉強-sample(5)【ngClass,*ngIf,directives】

フロントエンドエンジニア芸人もりたけんじのAngular2とTypeScriptのお勉強

ngClass,*ngIfはよく使う。ので最初に押さえておきたい。。


今回やったこと

・子component(directives)として親で描画

・クリック時にisCheckedを判定してfalseだったら子componentをhide

・isCheckedによってスタイルとテキストを変える

import { Component } from '@angular/core';
import { ChildComponent } from './app.childComponent';
import { Ngif } from 'angular/common';

@Component({
selector: 'my-app',
template: `
<h1 style="height:45px">WIP</h1>
<div [style.color]="isChecked ? '#e3e3e3': 'red'">{{isChecked ?'now is true' : 'now is false'}}</div>
<child-component *ngIf="isChecked"></child-component>
<input type="checkbox" [(ngModel)]="isChecked" />
{{isChecked}}
`,
directives: [ChildComponent]
})
export class AppComponent {
isChecked:boolean;
constructor(){
this.isChecked = !this.isChecked;
}
}

・サブツリーを削除する

今回のコード

でわまた〜〜

次のAngular2記事へ

他のAngular2記事

他のjavascript記事

【gulp】zsh: command not found: gulp!!!「急にgulpが壊れた!」と思ったら読む記事

【gulp】zsh: command not found: gulp!!!「急にgulpが壊れた!」と思ったら読む記事

zsh: command not found: gulp

まず。急には壊れません。
じゃあ原因は何だ!(お前だよ)
っていうのがありまして、
わたしも「ですよね、、」と思いながらも、ずーっとハマってて思い当たる節が色々ありすぎてわからなかった。

gulp
やっても
zsh: command not found: gulp
gulp -v
zsh: command not found: gulp(そりゃそうだ)

思い当たる節

・ログインshellいじった?
・nvmとかbrewとかいじった??
・nodeのバージョンあげたとか??
・npm i -g gulpでインストールはできるのに、gulpで実行できない($PATH通したつもり)
とか思い当たる節ある方。

これやってください。
前提条件
npm i -g gulp とnpm i gulpはやっている。インストールはされている。がそんなコマンドねーと言われる。

1.今のプロジェクトのnpmがどこをみているか確認

npm root
/Users/[userName]/Desktop/Git/react/playground/node_modules

2.今のグローバルのコマンド実行ファイルがどこを向いているか確認
npm root -g
/Users/[userName]/.npm-packages/lib/node_modules

ここのパスが問題だった。。
brewでnpmを実行していると見ているnode_modulesのパスが違う。。

3. npm config set prefix /usr/local

で変更する。下記をもう一回。
4. npm root -g
/usr/local/lib/node_modules
変わった。

そこにgulpをインストール。
5. npm i -g gulp


6. gulp

ありがとう解決してくれた英語記事

Angular2 for TypeScriptのお勉強-sample(4)【双方向バインディング】

フロントエンドエンジニア芸人もりたけんじのAngular2とTypeScriptのお勉強

Angularを使い始めてこれが一番驚いた記憶あるのですが、Angular2ではどのように書くのかと思い
チュートリアルのここらへん読みました。というか多分ここのページが全てだと思うので今後ここのやつ一通りやりたいと思います。

input内に入力するとその場でdirtyチェック?走ってリアルタイムに書き出されるのはAngularでもそうでしたが、
ngModelを[(ngModel)]="name"として定義するのですね。

また(click)="save($event)"としてクリック時$eventを渡すのですね($を書き忘れてなんでだってなりました)

今回のコード

でわまた〜〜

次のAngular2記事へ

他のAngular2記事

他のjavascript記事

Angular2 for TypeScriptのお勉強-sample(3)【clickしたら挨拶が変わるtoggleClick】

今日2回目の更新で、いっきにこのまま月曜まで一人ハッカソンやろうかな。今年最初の猛暑日みたいです。

フロントエンドエンジニア芸人もりたけんじのAngular2とTypeScriptのお勉強

こういうのみたりこういうのみたりしてました。

なるほどなと思ったのは、

今回下のようなコードかいたのです。
これはclickしたらコンバンワかこんにちわを判定して変えるものです。

@Component({
selector: 'my-app',
template: `<h1>{{greeting}}</h1><div>
<button (click)="getGreetingEvening()">click</button></div>    `
})
export class AppComponent {
greeting: string;
constructor(){
this.getGreeting();
}
getGreeting(){
this.greeting = "ohayou";
}
getGreetingEvening() {
if(this.greeting == 'ohayou'){
this.greeting = "konbanwa";
} else {
this.greeting = "ohayou";
}
}
}

onClick属性でやっていたら動かなかったのですがみてのとおり(click)としなくてはいけないのですね。
あと2回目ででてきたアプリケーションロジックには何も書きませんでしたが、今回templateにアクションごとに描画させたくて
greetingを変えることをやってみました。
ReactでいうrenderのJSXですねtemplateは

今回のコード

でわーまたー

次のAngular2記事へ

他のAngualr2記事

他のjavascript記事